Tuesday, 9 March 2010

Tangiable Fidicial Blocks


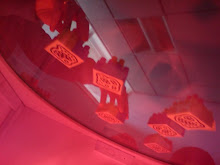
The above picture shows a ReacTable tangiable object, note the fiducial on one side. These are made out of perspex and the fiducuial is inlayed within the plasic. To have tangiable like this will set you back alot of money, because of the material and also because they will have to be custom made for you.

But I was still curious...

So I emailed the reacTable website to find out how much it would cost, and the got back to me straight away with the following email...
"Hi Abigail,
we produce them ourselves, we can sell you a Reactable set if you're interested. The price of a full set is €400,- If you need more information let me know.

All the best,

--Marcos Alonso

Reactable Systems

(+34) 93 1820 777

http://www.reactable.com/"

A little steap and out of my price range but I was happy that I got a responce from one of the men who helped make it.

Deturmined to find a alternitive way I emailed other, more local plasic molding factorys in the UK. I tryed
http://luminati.co.uk/.

I emailed them the imformation on how meny I required, which was 20, the fiducial picture i wanted inlayed within the plastic, and the size, and shape.

He most Kindly emailed me back with this:

"Dear Abigail

Thanks for the additional information.

As a one off project, I would suggest that we would need to charge around £350 minimum as there is a lot of fiddling around. For production, prices would drop significantly. If you require a formal quote, please can you supply all of the print ready artwork.

Thanks

John Gall
Director
Luminati Waycon Ltd
john
@luminati.co.uk ~ DDI : 01752 897928 ~ T : 01752 698720 ~ F : 01752 698116"

Again far too much but I was supprised to notice that the price of geting them custom made in the UK was about the same size if I was to buy them from spain.

The pro's of buying them from spain is that I would get a set identical to the ones being used on the reactable, It would be alot easyer to buy them from the ReacTable website.
Yet

If I bought my own from Luminati.co.uk I would have more creative licence meaning I could design them how I want have different shapes and colours to the ones they use on the true ReacTable, making mine different, and I like different.

But Alas having tangiables made in this material is to expensive, so I have to think of alternitive ways of making my tangiable blocks.

The good thing and most important reason why the tangiables inleyed in a perspex object is because the fiducial must be clear at all times when in contact with the video camera. Having the fiducial inlayed in plasic makes the tangiable more duriable and easyer to clean if dirty.

If a printed out paper fiducial is just idily stuck on the bottom of an object, that that fiducial picture will soon get grubby, and the paper will start to peel away after time. So I begain to think about a few factors of making my tangiable blocks, I wanted a material that is,

  1. light, so if droped on the glass surface the interface will not smash,
  2. strong,

  3. cheap

  4. easy to find

I also needed to make my fiducial pictures stronger and more durable than a simple sheet of paper.

I thought of lots of materials such as wood, but in the end I decided on using blocks of duplo.

The good thing I think with using Duplo instead of wood is that it would be lighter because its plastic, and easer to get hold of, as most toy shops stock duplo, but it would probily proove more expensive than wood. Also they are a good size.

Another thing I liked about using duplo is the fact that it is in its pure form a childs building block, and from one of my early posts I said that, building blocks are implortant to a childs learning, and creative thinking, and also it links to the idea of collaberation, I like this idea.

I found a large box of duplo for cheaper than I expected, it cost me £6.99 from the Entertainer shop in Cardiff Queens Arcade, which I thought was quite resonable. Below are some pictures of me making the tangiable blocks.


I selected two peices of duplo that were the same size and stuck them together useing glue, I then filled in the square holes with tishue paper and succured this with celetape. I did this so that the fiducial picture will have a more sturdy base to lie on. I then carefully cut out the fiducial marker and it's number, laminated the paper fiducial and finaly stuck the fiducial to the bottom of the new tangiable object using super glue.

I made 14 of these bocks and they are light, easy to move around the table, but the down side it that they are hard to tell apart from each other. I will have to mark them with a pen to know which one does what. This of course will not look as fancy as the ones designed by the reactable people but it's a nice, cheap and fun do it your self way of creating tangiables.

Monday, 8 March 2010

Translucent Tabletop!!

I had a go at taking out the IR filter from the PS3 eye toy, and it didn't work. I ended up just completely destroying my eye toy. This is a massive blow to my visual project status, and I cannot afford a camera with the price tag of  £1000 which will mean that I cant go ahead with succesfully projecting a visual aid onto the tabletop! This obviously is a great pity as I have been making progress with animation.  

I must admit that I will be unable to accomplish such a light show in the time that I have, and leave this part of the ReacTable for now.

However this does not mean, that I will not get visual feedback working at some point. As my dead line looms closer, I concentrate on making music with it. I will keep you all posted on any progress I make with the visual feedback.

I now need to buy another camera and start making some sound.

I would also like to add, for thoes who it may concern  that I made some progress with making my glass translucent.

I orded a sample from windowfilm.com and this is a picture of it....

I will continue with the visual feedback research after the hand in date for my final year project. 

I will get this working at some point, so watch this space.

Monday, 1 March 2010

Projector Research

This part of my research is prooving to be the most challenging so far. There seems to be very little information on this feature.

The Projector 

The Phillips LCD projector belongs to my collage, I will use this for testing.

I need to find out if this projector will be suitable for projecting the visual aid onto the surface. 

I have one problem with testing this tho, my table top is not yet translucent. Therefore it the beam of light will just shine straight though the glass.For the time being I made a paper circle of the same diameter of my glass tabletop and stuck it on the wall. By doing this I can work out the distance between the projector and the top of the table.

Calerbration 

Open ReacTivision and by pressing (h) on the keyboard you can access its proputys.
(note:The below picture is displayed in "sorce mode", which comes up if you press (s) on 
your keypad.)

I project the following image onto the white piece of paper that represents my tabletop. To get to this display press (c) on your keyboard. 
(c) means "Toggle Calibration" and can be found under the "CalibrationEngin" heading.

You can change the calibration to fit your personal needs by using (a), (d), (w) and (x) allows you to move though the cross points in this picture. The direction keys on your keypad allows you to modify the graph.

I projected this image onto the white sheet of paper, stood back till it fitted, and took a measument of the beam. To my horror I discovered that the distance of the beam was 9 foot.
I ask myself these question...
  1. Where is the projector possitioned in the true ReacTable
  2. How is it set up?
I found this picture on the internet

From looking at this picture it tells me a few things..
  1. The projector is fixed to the top of the cabinet,
  2. A mirror is used to extend the distance,
  3. IR LED's are used to illuminate the cabinet,
  4. the glass table top is not transparent.
I suspect that the mirror could be concave, I will think about this when I start experimenting with mirrors.

Another interesting thing about this picture is the glass tabletop, if I want the visual feed back I need something to project on to which means that I need to figure out a way of changing my transparent glass surface into a frosted translucent interface like the one in the picture.


Monday, 22 February 2010

Optic Research

Good lighting is the key to a well produced ReacTable.

Two things MUST be taking into accord when thinking about lighting 
  1. To track the objects the table needs to be is well illuminated. Allowing the camera and ReacTIVision to see the markers clearly.
  2. The glass screen must be dark enough so that the user can see the projected visual aid.
So I ask myself this question.....

How can I have a dark surface and illuminate the table at the same time?

Sound impossible?

All light from the visable specrum must be filtered through the camera, so that the projector image does not interfere with the tracking of the markers. 

As infrared light is just below the visible spectrum in frequency, an IR lamp can be used to illuminate the table so that the markers can be seen by the camera. 

IR lamps on ebay.co.uk go from about £20. I need to know the exact distance between the camera and the marker objects to know exactly how many LED IR's I need in order to get enough light. There is a shop on ebay that sells IR lamps, I will email the owner and see if I can get any further information on this.

If I am using Inferred light then I must think about how I will filter out all other visible light. The light from the projection will interfere with the camera. A filter can be used to do this, but I have found an alternative method.

The PS3 eye toy which I have decided to use in this project has a IR blocking lense inside the sencer.  I aim to take the camera apart and initially remove the IR blocking lense from the web cam.

below is a very helpfull video tutorial on how to do this:


part 2
The video tells me I can use an old floppy disc as a visible light blocking filter.


After watching this tutorial I decided to take my eye toy and have a go............


Sunday, 21 February 2010

My ReacTable Status 3

Building the cabinate

I now have all he conponants to begin to construct the cabinate where inside my video camera projector and light sorce will sit.  I have the follow
ing items;
  1. MDF 
  2. Glass
  3. Screws 
  4. Glue
  5. Woodern battons 
  6. Electronic screwdriver
The picture below shows the top of my cabinate where my glass will sit. It is of 2 pieces of square wood one slightly bigger than the other, creating a lip for the glass to sit on.


The picture below shows me marking the width of the board that will form the sides to my cabinet.  By doing this I can glue wooden batons on the the board to screw all the pieces together, making it like an IKEA flat pact ReacTable. 


The next picture shows me marking the width of  the batons  so when I glue them down they will be in the exact place.


Here I can be seen marking the spot for the screws to be placed, 3 times on each baton, equalling it out to 9 screws for 3 sides.


Here I am using the electric screw driver to make indents for the screws, this will make it easer for me to screw it all together.


This picture shows me using the hand screw driver to make the indents in which the screws will sit.


The final picture is of me putting glue on the batons, which I will stick onto the side the board to screw all 3 sides together


Tuesday, 16 February 2010

My ReacTable Status 2

The hardware side of things...

With regards to this I have so far been working via my laptop built in isight, I have just bought the following items;
  1. Round glass Tabletop which I had custom made from Trefforest glass and cost me £30. The glass has a diameter of 80cm 
  2. MDF wood which I had cut into 4 peices.
below is a diagram of the design of my further ReacTable cabinet

Glass table top case Side *4

I have decided to make my ReacTable square but keeping to the original circular peice of glass for the surface. 

I have chosen this design for a few reasons, 
  1. It is easier to construct than a circular cabinate
  2. It is cheaper 
  3. I can also project of to it's sides if need be.
I aim to perform my ReacTable for my final year recital in late May, and I feel that it is more important to master the audio side of the project before moving onto glass surface visual feed back element.

Yet.... 

If I produce a square box and paint it white I can project on the box more easily than on to its surface.  Instead of having the visual feedback I can program Pure Date to trigger pictures and videos onto the side of my box via the fiducial marker method.

This will it interesting for the audience as well as giving it a new edge that Is my own design.

This is the main reason why I have made my cabinate square.

I will post pictures of the finished product when I start to construct my reactable cabinet.


My ReacTable Status 1

The software side of things...

So far I have printed out the fiducial markers and I have downloaded ReacTIVision and TUIO protocol for pure data. I  have decided to work with Pure Data and my computer's built in eye site that I am using temperally until I get a external camera (this will follow in my research later).

Pure Data has been programmed to reconise fiducial marker 16. I will run some tests to see if 

Pure Data and ReacTIVision respond in the correct way.

Test 1, Does ReacTIVision recognise fiducial number 16 and send it's imformation to Pure Data via TUIO?

Test 1 compleate

Yes ReacTivision does see fidutial 16, the picture below shows this, note how the number of fiducial is displayed in the center of the marker. Pure Data does detect its x/y possitioning.


Test 1.2, Can osc sound be heard once marker is held up?
Test 1.2 complete 

Yes when I hold up a marker 16 osc sound can be heard, demonstration video can be seen below.


Test 1.3,  Turn fiducial left, does pitch increase? 
Left turn = Pitch Increase

Test 1.4, Turn fiducial marker right, does pitch decrease?
Right turn =pitch decrease

(note video is inverted)


As you can see from my video's my tests were a success, the next thing I shall do with regards to programming the music software will be to add another affect such as reverb or delay to the x position of my markers.  Meaning that when I move the marker to the left or right it will effect the amount of musical effect on the sound. I will post more of my progress in a further blog.